
electorn+vue+python的架构实现
# 1. 创建项目
# 创建并进入项目目录
mkdir electron-vue-demo
cd electron-vue-demo

# 使用 electron-vite 创建项目
npm create @quick-start/electron@latest

# 选择配置:
Project name: … <electron-app>
✔ Select a framework: › vue
✔ Add TypeScript? … No / Yes
✔ Add Electron updater plugin? … No / Yes
✔ Enable Electron download mirror proxy? … No / Yes

Scaffolding project in ./<electron-app>...
Done.
2
3
4
5
6
7
8
9
10
11
12
13
14
15
16
# 2. 项目结构
electron-vue-demo/
├─ src/
│  ├─ main/        # Electron 主进程
│  │  └─ index.js  # 主进程入口
│  ├─ preload/     # 预加载脚本
│  │  └─ index.js
│  ├─ renderer/    # Vue 前端代码
│  │  ├─ src/
│  │  ├─ App.vue
│  │  └─ main.js
│  └─ python/      # Python 脚本(自己创建)
│     └─ test.py
├─ electron.vite.config.js
└─ package.json
2
3
4
5
6
7
8
9
10
11
12
13
14
此时运行一下看看:
# 3. Python 脚本
创建 src/python/test.py:
import sys
import json
def main():
# 获取参数
# sys.argv是一个列表,包含了运行Python脚本时命令行输入的所有参数
# sys.argv[0]是脚本本身的文件名
# sys.argv[1:]表示从第1个参数开始到最后,也就是去掉脚本名后的所有参数
args = sys.argv[1:]
# 返回结果
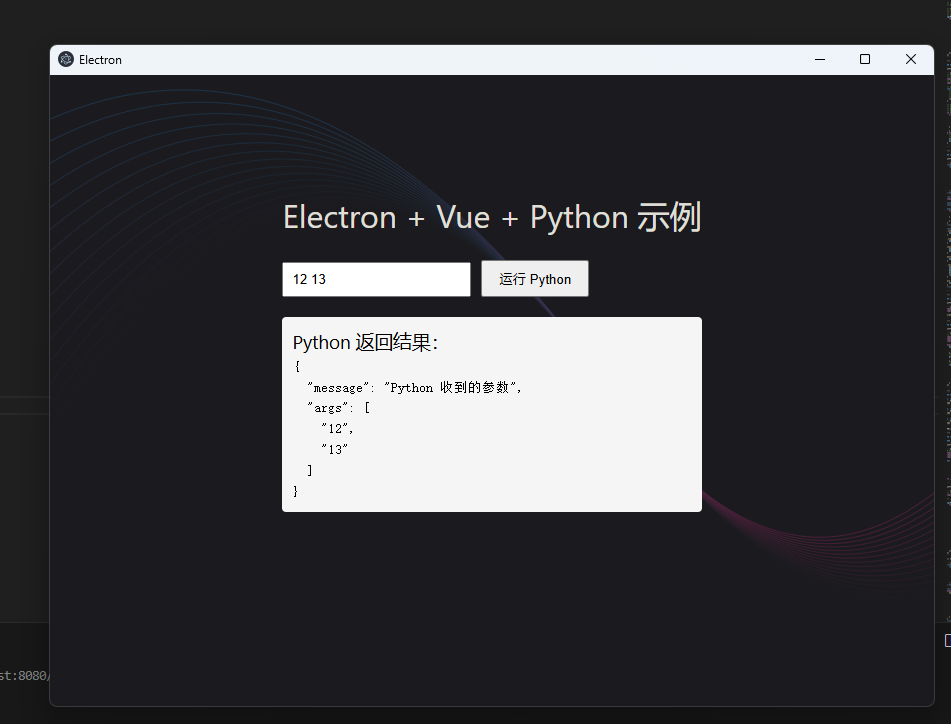
result = {
"message": "Python 收到的参数",
"args": args
}
# 打印 JSON 结果
print(json.dumps(result))
if __name__ == "__main__":
main()
2
3
4
5
6
7
8
9
10
11
12
13
14
15
16
17
18
19
20
21
# 4. 主进程代码
修改 src/main/index.js:
import { app, shell, BrowserWindow, ipcMain } from 'electron'
import { join } from 'path'
import { electronApp, optimizer, is } from '@electron-toolkit/utils'
import { execFile } from 'child_process' // 用于直接执行一个可执行文件
import icon from '../../resources/icon.png?asset'

let mainWindow

function createWindow() {
  // 创建主窗口
  mainWindow = new BrowserWindow({
    width: 900,
    height: 670,
    show: false, // 初始不显示,等内容准备好后再显示
    autoHideMenuBar: true, // 自动隐藏菜单栏
    ...(process.platform === 'linux' ? { icon } : {}), // Linux 下设置窗口图标
    webPreferences: {
      preload: join(__dirname, '../preload/index.js'), // 预加载脚本
      sandbox: false // 关闭沙箱
    }
  })

  // 当窗口内容渲染完成后再显示窗口,提升用户体验,避免显示空白或加载过程。
  mainWindow.on('ready-to-show', () => {
    mainWindow.show()
  })

  // 外部链接处理
  // 拦截所有新窗口打开请求(如 <a target="_blank">),用系统默认浏览器打开外部链接,防止 Electron 内部打开不安全页面。
  mainWindow.webContents.setWindowOpenHandler((details) => {
    shell.openExternal(details.url)
    return { action: 'deny' }
  })

  // 开发/生产环境区分加载页面
  // 开发环境下加载本地开发服务器(支持热重载)。
  // 生产环境下加载打包好的本地 HTML 文件。
  if (is.dev && process.env['ELECTRON_RENDERER_URL']) {
    mainWindow.loadURL(process.env['ELECTRON_RENDERER_URL'])
  } else {
    mainWindow.loadFile(join(__dirname, '../renderer/index.html'))
  }
}

// 应用初始化与快捷键管理
app.whenReady().then(() => {
  // 为 Windows 设置应用模型 ID,便于系统识别。
  electronApp.setAppUserModelId('com.electron')

  // 开发环境下支持 F12 打开/关闭开发者工具,生产环境下禁用刷新等快捷键。
  // see https://github.com/alex8088/electron-toolkit/tree/master/packages/utils
  app.on('browser-window-created', (_, window) => {
    optimizer.watchWindowShortcuts(window)
  })

  // 主进程监听 ping 消息,收到后打印 pong,用于测试主进程和渲染进程的通信。
  ipcMain.on('ping', () => console.log('pong'))

  //初始化时创建主窗口。
  createWindow()

  app.on('activate', function () {
    // macOS 下点击 Dock 图标且没有窗口时,重新创建窗口
    if (BrowserWindow.getAllWindows().length === 0) createWindow()
  })
})

//  跨平台关闭行为
// 除了 macOS(darwin),关闭所有窗口时退出应用。
// macOS 下应用和菜单栏会保持激活,直到用户用 Cmd + Q 退出。
app.on('window-all-closed', () => {
  if (process.platform !== 'darwin') {
    app.quit()
  }
})

// 主进程代码可扩展
// 你可以在这个文件继续写主进程相关代码,也可以把主进程功能拆分到其他文件再引入进来,方便项目结构管理。

// 监听 IPC 调用
// ipcMain.handle 用于注册一个异步的 IPC 处理器,监听渲染进程通过 ipcRenderer.invoke('run-python', args) 发来的请求。
// 'run-python' 是消息通道名。
// args 是渲染进程传过来的参数。
ipcMain.handle('run-python', async (_event, args) => {
  return new Promise((resolve, reject) => {
    const scriptPath = join(__dirname, '../../src/python/test.py')
    //  执行 Python 脚本
    //  用 Node.js 的 execFile 方法调用本地 Python 解释器,执行 test.py 脚本。
    // [scriptPath, ...(args || [])] 表示把脚本路径和参数一起传给 Python 脚本。
    // 回调函数有三个参数:error(错误信息)、stdout(标准输出)、stderr(标准错误输出)。
    execFile('python', [scriptPath, ...(args || [])], (error, stdout, stderr) => {
      if (error) {
        reject(stderr)
      } else {
        try {
          resolve(JSON.parse(stdout))
        } catch {
          resolve(stdout)
        }
      }
    })
  })
})
2
3
4
5
6
7
8
9
10
11
12
13
14
15
16
17
18
19
20
21
22
23
24
25
26
27
28
29
30
31
32
33
34
35
36
37
38
39
40
41
42
43
44
45
46
47
48
49
50
51
52
53
54
55
56
57
58
59
60
61
62
63
64
65
66
67
68
69
70
71
72
73
74
75
76
77
78
79
80
81
82
83
84
85
86
87
88
89
90
91
92
93
94
95
96
97
98
99
100
101
102
103
# 5. 预加载脚本
修改 src/preload/index.js:
// Electron 提供的安全 API,用于在预加载脚本中把主进程/Node 能力暴露给渲染进程(前端页面)。
// ipcRenderer:Electron 提供的渲染进程与主进程通信的模块,可以用来发送/接收消息。
import { contextBridge, ipcRenderer } from 'electron'
// electronAPI:@electron-toolkit/preload 提供的 Electron 常用 API 封装。
import { electronAPI } from '@electron-toolkit/preload'

// 定义一个空对象 api,你可以在这里添加自定义的前后端通信方法,后续可以扩展。
const api = {
  //runPython 是一个函数,接收参数 args。
  //内部通过 ipcRenderer.invoke 发送一个名为 'run-python' 的异步消息到主进程,并传递参数 args。
  //主进程收到 'run-python' 消息后,会执行对应的处理(比如运行 Python 脚本),并把结果返回给渲染进程。
  //这是一个Promise,前端可以用 await window.api.runPython(args) 获取结果。
  runPython: (args) => ipcRenderer.invoke('run-python', args)
}

// 判断是否启用 context isolation
// context isolation(上下文隔离)是 Electron 的安全机制,推荐开启。
// 如果启用,渲染进程和 Node 环境完全隔离,不能直接访问 Node API,必须用 contextBridge 暴露。
// 如果没启用,可以直接挂到 window 全局对象(不安全,开发阶段常用)。
if (process.contextIsolated) {
  try {
    // 安全暴露 API
    // 用 contextBridge 把 electronAPI 和自定义的 api 安全地暴露到渲染进程的 window 对象上。
    // 这样前端页面可以通过 window.electron 和 window.api 访问这些 API。
    contextBridge.exposeInMainWorld('electron', electronAPI)
    contextBridge.exposeInMainWorld('api', api)
  } catch (error) {
    console.error(error)
  }
} else {
  // 非隔离模式下直接挂载
  // 如果没启用 context isolation,直接把 API 挂到 window,前端页面可以直接访问。
  window.electron = electronAPI
  window.api = api
}
2
3
4
5
6
7
8
9
10
11
12
13
14
15
16
17
18
19
20
21
22
23
24
25
26
27
28
29
30
31
32
33
34
35
36
# 6. Vue 组件
修改 src/renderer/src/App.vue:
<template>
  <div class="container">
    <h1>Electron + Vue + Python 示例</h1>

    <div class="input-group">
      <input v-model="inputText" placeholder="输入参数">
      <button @click="runPython">运行 Python</button>
    </div>

    <div class="result" v-if="result">
      <h3>Python 返回结果:</h3>
      <pre>{{ JSON.stringify(result, null, 2) }}</pre>
    </div>
  </div>
</template>

<script setup>
import { ref } from 'vue'

const inputText = ref('')
const result = ref(null)

async function runPython() {
  try {
    const args = inputText.value.split(' ').filter(Boolean)
    result.value = await window.api.runPython(args)
  } catch (error) {
    result.value = { error: String(error) }
  }
}
</script>

<style>
.container {
  padding: 20px;
}

.input-group {
  margin: 20px 0;
}

input {
  padding: 8px;
  margin-right: 10px;
}

button {
  padding: 8px 16px;
}

.result {
  margin-top: 20px;
  padding: 10px;
  background: #f5f5f5;
  border-radius: 4px;
  color: #000;
}

pre {
  white-space: pre-wrap;
}
</style>
2
3
4
5
6
7
8
9
10
11
12
13
14
15
16
17
18
19
20
21
22
23
24
25
26
27
28
29
30
31
32
33
34
35
36
37
38
39
40
41
42
43
44
45
46
47
48
49
50
51
52
53
54
55
56
57
58
59
60
61
62
63
# 7. 入口文件
修改 src/renderer/src/main.js:
import { createApp } from 'vue'
import App from './App.vue'

createApp(App).mount('#app')
2
3
4
# 8. 配置文件
修改 electron.vite.config.js:
// 用于配置 Electron 应用的三大部分:主进程(main)、预加载脚本(preload)、渲染进程(renderer)。
import { resolve } from 'path'
import { defineConfig, externalizeDepsPlugin } from 'electron-vite'
import vue from '@vitejs/plugin-vue'

export default defineConfig({
  main: {
    // 使用 externalizeDepsPlugin 插件,将 node_modules 里的依赖包自动标记为外部依赖,避免被打包进主进程产物,提升构建速度和兼容性。
    plugins: [externalizeDepsPlugin()]
  },
  //preload 部分配置 Electron 的预加载脚本(如 src/preload/index.js)。
  preload: {
    plugins: [externalizeDepsPlugin()]
  },
  // renderer 部分配置 Electron 的渲染进程(前端页面,通常是 Vue/React/HTML)。
  renderer: {
    resolve: {
      // 配置路径别名:@renderer 代表 src/renderer/src 目录,方便在项目中用 @renderer/xxx 方式导入组件或模块,提升开发效率。
      alias: {
        '@renderer': resolve('src/renderer/src')
      }
    },
    //使用 @vitejs/plugin-vue 插件,支持在渲染进程中编写和解析 .vue 单文件组件。
    plugins: [vue()]
  }
})
2
3
4
5
6
7
8
9
10
11
12
13
14
15
16
17
18
19
20
21
22
23
24
25
26
# 9. 运行和测试
- 安装依赖:
npm install
- 开发模式:
npm run dev
- 打包:
npm run build
现在我们测试一下python脚本的返回能不能被正确拿到
# 10. 添加更多功能
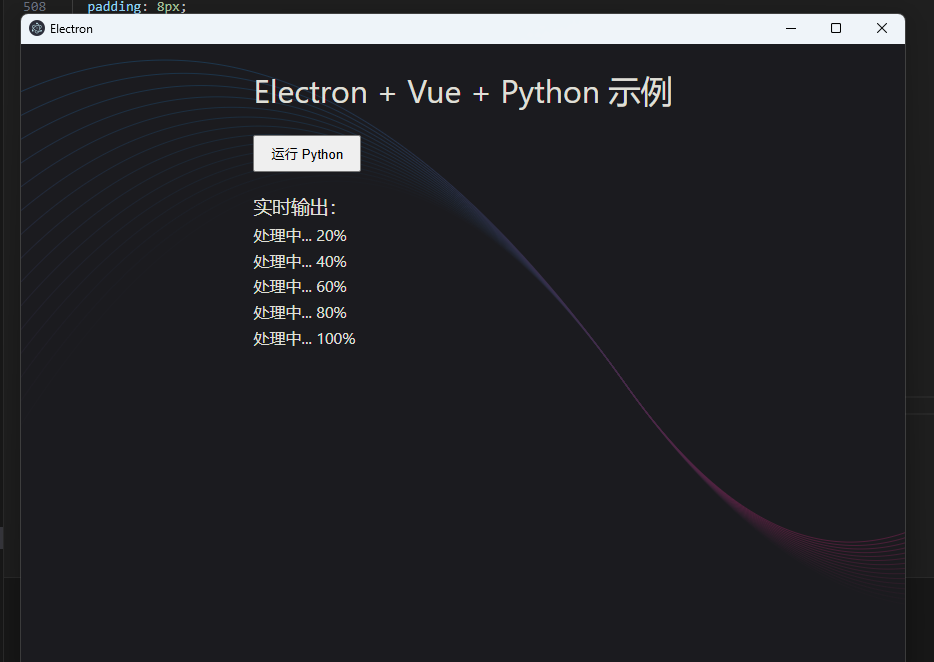
# 1. 实时输出示例
修改 Python 脚本以支持实时输出:
# src/python/test.py
import sys
import time
import json

def main():
    for i in range(5):
        result = {
            "progress": i + 1,
            "message": f"处理中... {(i + 1) * 20}%"
        }
        print(json.dumps(result), flush=True)
        time.sleep(1)

if __name__ == "__main__":
    main()
2
3
4
5
6
7
8
9
10
11
12
13
14
15
16
print(...) 将内容输出到标准输出(stdout) 在 Electron 中,主进程可以通过 child_process.spawn 的 stdout.on('data', ...) 实时读取这些输出
flush=True 关键参数:强制立即刷新输出缓冲区 默认情况下,print() 的输出会被缓存,不会立即发送 加上 flush=True 后,输出会立即发送,确保 Electron 能实时接收到数据
修改主进程代码以支持实时输出:
// src/main/index.js
import { spawn } from 'child_process'

// ... 其他代码 ...

ipcMain.handle('run-python-stream', (_event, args) => {
  return new Promise((resolve, reject) => {
    const scriptPath = join(__dirname, '../../src/python/test.py')
    // 用 spawn 启动一个新的 Python 进程,执行 test.py,并传递参数。
    // spawn 可以实时获取子进程的输出(比 execFile 更适合流式输出)。

    const pythonProcess = spawn('python', [scriptPath, ...(args || [])])

    let output = []

    // 每当 Python 脚本有输出(如 print(json.dumps(...))),就会触发 data 事件。
    pythonProcess.stdout.on('data', (data) => {
      try {
        //尝试将输出内容解析为 JSON 对象。
        //解析成功后,通过 mainWindow.webContents.send('python-output', result) 实时推送到前端页面(渲染进程)。
        const result = JSON.parse(data.toString())
        mainWindow.webContents.send('python-output', result)
        output.push(result)
      } catch (e) {
        console.error('解析输出失败:', e)
      }
    })

    // 当 Python 进程结束时触发
    pythonProcess.on('close', (code) => {
      // 如果退出码为 0(正常退出),就把所有输出结果数组 output 作为 Promise 的结果返回。
      if (code === 0) {
        resolve(output)
      } else {
        //如果退出码非 0,说明有异常,调用 reject 返回错误信息。
        reject(`Python 进程退出,代码: ${code}`)
      }
    })
  })
})
2
3
4
5
6
7
8
9
10
11
12
13
14
15
16
17
18
19
20
21
22
23
24
25
26
27
28
29
30
31
32
33
34
35
36
37
38
39
40
在 Vue 组件中接收实时输出:
<template>
  <div class="container">
    <h1>Electron + Vue + Python 示例</h1>

    <div class="input-group">
      <button @click="runPython">运行 Python</button>
    </div>

    <div class="progress" v-if="progress.length">
      <h3>实时输出:</h3>
      <div v-for="(item, index) in progress" :key="index">
        {{ item.message }}
      </div>
    </div>
  </div>
</template>

<script setup>
import { ref } from 'vue'

const result = ref(null)
const progress = ref([])

async function runPython() {
  try {
    result.value = await window.api.runPythonSteam()
  } catch (error) {
    result.value = { error: String(error) }
  }
}

window.electron.ipcRenderer.on('python-output', (event, data) => {
  progress.value.push(data)
})

</script>

<style>
.container {
  padding: 20px;
  height: 600px;
  overflow: auto;
}

.input-group {
  margin: 20px 0;
}

input {
  padding: 8px;
  margin-right: 10px;
}

button {
  padding: 8px 16px;
}

.result {
  margin-top: 20px;
  padding: 10px;
  background: #f5f5f5;
  border-radius: 4px;
  color: #000;
}

pre {
  white-space: pre-wrap;
}
</style>
2
3
4
5
6
7
8
9
10
11
12
13
14
15
16
17
18
19
20
21
22
23
24
25
26
27
28
29
30
31
32
33
34
35
36
37
38
39
40
41
42
43
44
45
46
47
48
49
50
51
52
53
54
55
56
57
58
59
60
61
62
63
64
65
66
67
68
69
# 11.package.json中script的作用
 "scripts": {
    // 用 Prettier 自动格式化整个项目的代码,保持代码风格统一
    "format": "prettier --write .",
    // 用 ESLint 检查代码规范和潜在错误,--cache 表示只检查有变动的文件,加快速度。
    "lint": "eslint --cache .",
    // 启动 Electron 应用的预览模式,通常用于本地预览生产环境打包后的效果。
    "start": "electron-vite preview",
    // 启动开发模式,支持热重载,适合开发调试。
    "dev": "electron-vite dev",
    // 用 electron-vite 对主进程、预加载脚本、渲染进程进行打包,生成生产环境代码(但不是安装包)。
    "build": "electron-vite build",
    // 在 npm install 后自动执行,安装 Electron 原生依赖(如有用到 node-gyp、sqlite3、serialport 等原生模块时必需)。
    "postinstall": "electron-builder install-app-deps",
    // 先用 electron-vite build 构建项目,再用 electron-builder 打包为“未压缩目录”(不是安装包,适合调试或自定义打包流程)。
    "build:unpack": "npm run build && electron-builder --dir",
    // 先构建项目,再用 electron-builder 打包成 Windows 安装包(如 .exe、.msi)。
    "build:win": "npm run build && electron-builder --win",
    // 先构建项目,再用 electron-builder 打包成 macOS 安装包(如 .dmg、.pkg)。
    "build:mac": "npm run build && electron-builder --mac",
    // 先构建项目,再用 electron-builder 打包成 Linux 安装包(如 .AppImage、.deb、.rpm)。
    "build:linux": "npm run build && electron-builder --linux"
  },
2
3
4
5
6
7
8
9
10
11
12
13
14
15
16
17
18
19
20
21
22
# 12.打包
# 打开调试窗口
// src/main/index.js
const { app, BrowserWindow, globalShortcut } = require('electron')

let mainWindow

function createWindow() {
  mainWindow = new BrowserWindow({
    // ...你的窗口参数...
  })

  // 你的其他窗口初始化代码...
  // 打开调试窗口,打包的时候删除这行
  mainWindow.webContents.openDevTools()
}
2
3
4
5
6
7
8
9
10
11
12
13
14
# 打包python
此时运行打包命令python将无法执行,因为python文件并没有被一起打包过去。
electron-vite 实际上是用 electron-builder (opens new window) 进行最终的安装包打包,所以把 Python 文件或可执行文件打包进安装包的方法和 electron-builder 是一样的,关键在于配置 extraResources。
- 在项目中放置你的 Python 文件
Python 文件在 src/python/test.py,你也可以放在其他目录。
- 配置
extraResources(关键步骤)
在你的 package.json 里添加(或修改)build.extraResources 字段:
"build": {
  "extraResources": [
    {
      "from": "src/python",   // 源目录(相对项目根目录)
      "to": "python"          // 安装包里的目标目录
    }
  ]
}
2
3
4
5
6
7
8
这样,打包后 src/python 目录下的所有文件(包括 test.py)都会被复制到安装包的 resources/python/ 目录下。
- Electron 代码中获取正确路径
打包后,资源文件会被放在 resources 目录下。你需要这样获取路径:
const { app } = require('electron')
const path = require('path')

let scriptPath
if (app.isPackaged) {
  // 打包后
  scriptPath = path.join(process.resourcesPath, 'python', 'test.py')
} else {
  // 开发环境
  scriptPath = path.join(__dirname, '../../src/python/test.py')
}
2
3
4
5
6
7
8
9
10
11
- 打包命令
npm run build
npm run build:win   # 或 build:mac、build:linux
2
- 检查打包结果
- 安装后,去你的应用安装目录(如
C:\Users\你的用户名\AppData\Local\你的应用名\resources\python\test.py)确认 Python 文件是否存在。 然后实际运行一下安装的文件,注意,自己的电脑上需要安装python
# 13.将python打包成exe
在 Electron 项目中自动完成 Python 脚本的打包,并把生成的 exe 一起打包进 Electron 安装包。这样用户电脑就不用特意安装python了
# 1. 在 Electron 项目中集成 PyInstaller 打包
# (1)在项目根目录新建一个脚本, build-python.js:
// build-python.js
const { execSync } = require('child_process')
const path = require('path')

const scriptPath = path.join(__dirname, 'src/python/test.py')

console.log('正在用 PyInstaller 打包 Python 脚本...')
execSync(`pyinstaller -F "${scriptPath}"`, { cwd: path.join(__dirname, 'src/python'), stdio: 'inherit' })
console.log('Python 脚本打包完成!')
2
3
4
5
6
7
8
9
# (2)在 package.json 的 scripts 里加一条:
"scripts": {
  // ... 其他命令 ...
  "build:python": "node build-python.js",
  "build": "npm run build:python && electron-vite build",
  "build:win": "npm run build:python && electron-vite build && electron-builder --win"
}
2
3
4
5
6
这样每次 npm run build 或 npm run build:win 都会先自动打包 Python 脚本。
# 2. 配置 electron-builder 打包 exe
在 package.json 里添加(或修改)build.extraResources:
"build": {
  "extraResources": [
    {
      "from": "src/python/dist",
      "to": "python"
    }
  ]
}
2
3
4
5
6
7
8
这样打包后,test.exe 会被放到安装包的 resources/python/test.exe 目录下。
# 3. Electron 主进程中调用 exe
import { app, shell, BrowserWindow, ipcMain,globalShortcut } from 'electron'
import { join } from 'path'
import { electronApp, optimizer, is } from '@electron-toolkit/utils'
import { execFile, spawn, exec } from 'child_process'

//...
let scriptPath
if (app.isPackaged) {
    // 打包后
    scriptPath = join(process.resourcesPath, 'python', 'test.exe')
} else {
    // 开发环境
    scriptPath = join(__dirname, '../../src/python/test.py')
}

// 用 spawn 启动一个新的 Python 进程,执行 test.py,并传递参数。
// spawn 可以实时获取子进程的输出(比 execFile 更适合流式输出)。
//在开发环境和打包好的环境下运行python脚本调用传参略微有点不同,因为我们打包好的时候python脚本已经是exe文件了,因此不需要传scriptPath
let pythonPath
    if(app.isPackaged){
      pythonPath = scriptPath
      pythonProcess = spawn(pythonPath, [...(args || [])])
    }else{
      pythonPath = 'python'
      pythonProcess = spawn(pythonPath, [scriptPath, ...(args || [])])
    }
//....
2
3
4
5
6
7
8
9
10
11
12
13
14
15
16
17
18
19
20
21
22
23
24
25
26
27
# 4. 一键打包流程
开发环境下,先安装好 pyinstaller(只需一次):
pip install pyinstaller1打包命令(自动完成 Python 脚本打包+Electron 打包):
npm run build:win1或
npm run build1
# 5. 注意
- 如果有多个 Python 脚本,可以在
build-python.js里循环打包。 - 如果 Python 脚本有依赖第三方库,建议用虚拟环境,pyinstaller 会自动分析依赖。
- 如果你想在 Mac 或 Linux 下也支持,pyinstaller 需要在对应系统下打包。